Wednesday, September 30, 2015

Death of the Kodo, acquisition of the DJI Phantom 3 Professional and other news


Welcome back!  It’s been a couple of weeks since I did an update here.  In that time we have taken possession of our new Phantom 3 Pro UAV and I managed to wear out one of the motors in the Kodo.  We purchased the Phantom 3 (P3P) with the hardshell backpack, 2 extra props and 1 extra battery from B&H in New York.  Please excuse my snarling face in the video above :)

The Kodo’s Status


I have been flying the Kodo every day to practice.  During the week I practice at sunset and on weekends I try to practice at sunrise and sunset to get 2 sessions of practice for the day.  As with anything of this nature, practice makes perfect and that is true here.
I have been getting better with it.  Hover is no issue.  I can fly the quad around a bit and generally stay in control.  I do not feel like the quad gets away from me (as in I cut the throttle because it’s no longer controllable by me).

My training regimen consists of the following (I break down the exercises by battery):
  • 1st battery: Warmup and basic hover practice
  • 2nd battery: Hop between 2 spots on the ground about 15’ apart
  • 3rd battery: practice 10:00 and 2:00 hover*
  • 4th battery: practice 10:00 and 2:00 hover*
  • 5th battery: Have some fun

*3rd and 4th batteries are used to hover the quad while the front of the quad is aimed at the 10:00 angle and 2:00 angle.  Once I have those mastered, I will move on to a 9:00/3:00 angle and after that I will move to nose in hovering (quad is facing me, controls are reversed).

Ultimately, I will be happy when I can do a nose-in hover with ease as well as fly in a circle and a figure 8.  That is the goal.

In other Kodo news, I have been using my GoPro to record my sessions with the Kodo.  I will cut together some of that and post it up here so you can see my pathetic attempts at flying.  This past weekend, while flying the Kodo in the backyard, the Kodo decided to take off on its own and it slammed into a wall behind me as I was flying it.

I thought it was odd and that maybe there was some RF interference that caused it to do that so I moved to the other side of the yard.  I flew for a few minutes before the Kodo decided to slam into my shin and cut me.  Again I dusted it off and flew for a little while without incident.

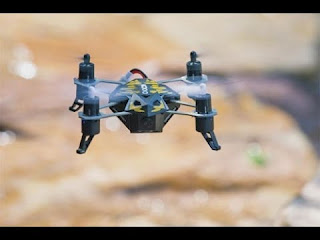
On the last battery, the Kodo flew for about 2 minutes and then I landed it.  Attempting to take off again failed as the left front motor died.  I attributed the the odd flight characteristics exhibited by the Kodo previously to this motor failure and indeed the GoPro footage confirmed this.

We ordered a new motor on Amazon for it (they come in pairs for about $10) and I will replace the dead one once the new one arrives.

So, sadly, no more Kodo practice until I get my new motor.  Guess I will have to play with the P3P then…

The Phantom 3 Professional


We had the P3P for a little over a week before we actually got around to unboxing it and setting it up.  The boxes that it shipped in were pretty beat up by UPS but nothing inside was damaged. 

Speaking of, it seems like UPS’s disrespect for packages has increased of late.  Was a time when most packages were intact.  Now I do not remember the last time that happened…

We only have 1 device that will run the DJI Phantom app (the GO app) and that is my iPad Air (first gen).  My wife is considering a new iPhone 6s+ or an iPad Air II so we will be able to use those as well.

We charged up the batteries and the remote, installed the app and attempted to power the rig up.  We turned the remote on first with the iPad (ALWAYS turn the remote on first (and LAST) – If you power up the quad first, it may think it has lost connection to the remote and attempt to do a return to home – to whatever its last home point was…).

Once all of that was up and running and the app was talking to the remote, we removed the quad’s camera gimbal clamp and powered up the quad (sans props of course) which emitted a rather loud set of musical tones.  When the app started talking to the quad and displaying its camera feed, we noticed that it reported a gimbal error and that it wanted to have its firmware updated.

The gimbal error was a bit dismaying but after a bit of online research, some folks indicated that the gimbal could report a false error with certain firmware versions.  So the first task was to update the firmware.

Updating the Firmware


This was a pretty painless process.  I downloaded the latest firmware from DJI, copied the .BIN file to the microSD card, inserted the card into the P3P and powered it up.  This is the ONLY instance where you can power up this quad without the remote being turned on first.

The P3P took about 25 minutes to perform the update and during that time emitted a constant beeping sound.  I expected this after reading up on it online so I put it in the bathroom expecting it to be as loud as the startup sounds but that was not the case.  The beeping was pretty quiet after all but I left it in the bathroom with the door open so I could hear the louder beeps it might make.

Following the P3P’s update, I attempted to update the remote control.  As it turned out, there was no update for the remote in the update file that I used for the P3P.  It turns out that I had to download the previous firmware file and it had the update so we were able to update the remote with no issues  The remote took about 10 minutes to perform the firmware update.

The final status


Once updated, the app no longer complained about a gimbal error.  YAY!  However I was not convinced that the gimbal was 100%.  I noticed it twitching left and right when the P3P was just sitting idle.   I decided to pick up the P3P and walk around the house with it while recording.

When I reviewed that footage, the image was very shaky and unstable.  I was very disappointed but thought that maybe when the P3P is in flight that the gimbal would just work.  However, it turns out that there is yet another bit of packing material that is wedged behind the gimbal for shipping purposes.


Once I removed it, the gimbal worked perfectly.  No twitching while it is idle and walking through the house with it looked smoother than a Steadicam shot.  Excellent.

Once all of that was resolved, both my wife and I were able to make good use of the simulator.  My initial practicing involved getting the quad to fly in a circle with combined rudder/yaw.  I think it will help a lot with this coordinated skill.  I started by applying 100% rudder (roll) so the quad would spin in place and then slowly started adding in YAW, the effect being that as I added more and more YAW, the size of the circle increased.  Still a lot of practice to do on that.

We have not flown the P3P yet as we are still waiting for the Strong Arm reinforcements.  And, with that, we may have run into a small snag.  We plan to use the Strong Arms with a set of Bestem quick release prop guards.  We need the quick release so that we can use the backpack case.  The Strong Arm product supports being used in conjunction with the Bestem guards but we need to understand how much we will need to modify the backpack case’s foam to accommodate this.

In the next installment, I will have actual footage from our maiden flight so stay tuned!

Saturday, September 12, 2015

Flying Small Objects


We had a family emergency this past week and that put things on hold for a bit.  In the mean time I have practiced more with the Kodo and my latest efforts are above.  Such as they are.

Our Phantom 3 Professional  will be here next Thursday the 17th.  It will be a few weeks before we take it out to fly.  The reason for the delay is that we do not want to fly the drone before we can put both strong arms and prop guards.

Strong Arms

Strong Arm is a product that is intended to overcome a design flaw in the shell of the phantom.  The plastic around the screws where the motors are affixed can become cracked from the stress of the brushless motor.  This issue is very widely reported.  Some have reported it after as few as 12 flights.

These cracks can allow the motor to separate from the shell and then a lovely crash ensues.

A company in Texas makes a reenforcement plate for the Phantom that overcomes the issue called Strong Arm.  I am not going to risk a single flight without using those.  Unfortunately, the current version precludes the use of prop guards and, as a beginner, I want prop guards on my flying lawnmower.

So, that is where we are at.  If you are bored, DJI announced a new camera for the Inspire 1 and you can read all about it here.

Next post I will have some thoughts on the new Inspire camera.  Until then, fly safe, fly legal, but fly!

Sunday, September 6, 2015

Choosing the Right UAV Part III: Conclusion

Kodo Wrap Up


After about 3 hours of flight time, I was confident with the Kodo in beginner mode.  I was able to immediately take off and maintain a decent hover.  Every time I crashed it was due to making adjustments that were too extreme mainly due to panic on my part.

In this video, I recorded a little footage using the Kodo’s built in camera.


As you can see, it’s really just for personal amusement and nothing more.  Sadly, the microSD card that came with the Kodo was defective and after a couple of uses became unusable resulting in about 30 minutes of lost video.  Be thankful I lost that video and did not include it above. :)

Another hour or so of flight time spent flying the quad backwards (facing me) was very useful and helped if I wanted to change the direction of the quad and maintain control.

The Kodo has been a great learning tool and will continue to be so as I will use it to practice with instead of practicing with the larger Quads.  And speaking of larger quads, it’s time to talk about what we have settled on with regard to a production grade quad that will fly a gimbal mounted HD or better camera.

The DJI Way and managing the pilot’s risks


After a great deal of research, we have concluded that, ultimately, the DJI Inspire 1 will be our UAV of choice for production.  As noted in part one of this series of blog posts, we have calculated the cost of investment and ROI.

What I have not spoken about much yet is risk.  And there are a wide variety of risks associated with this type of work including, but not limited to:


  • You book a gig to shoot aerial.  Either before the gig or during the gig you crash the UAV or suffer some other form of catastrophic failure.  Goodbye gig unless you have a backup.
  • You crash the UAV and cause damage to other persons and or property.  This can happen even with the best pilots.  The UAV can have a failure in flight and go out of control.  The pilot can make a mistake.

Let’s talk about the first one there.  In an effort to provide us with a backup system to the Inspire one, we have identified the DJI Phantom 3 Professional (P3P) as a viable backup platform.  The  P3P has the same camera as the Inspire 1 so the footage will match.  It lacks the stability and much of the capability of the Inspire but it offers these advantages beyond matching the camera:


  • It’s relatively inexpensive: $1259
  • It can withstand more of a physical impact than the Inspire
  • It’s easier to repair than the Inspire 1.

This will be our first purchase.  We will order the following:


  • DJI Phantom 3 Professional
  • 1 extra battery
  • Prop guards
  • Case

We are getting this case:


Which is a generic version of the same DJI case that goes for $150.

Depending on when we take delivery, best case we will do a maiden flight with it around the weekend of the 12th.  I will, of course post following that flight.

Now, on to the second item there.  

Insurance


Ya gotta have it.  You will need to extend your business liability insurance in the event that you damage property or injure someone while in the course of filming with your UAV.

If you do NOT intend to use your UAV for business, you can get insurance by joining the AMA.  It’s the most reasonable price you will find for this kind of insurance.

Regardless of your use, everyone needs damage insurance for their UAV.  Our research has identified only ONE underwriter of this type of insurance:


Looks like really nice coverage.  We are early in the development of both UAVs and the cottage industries that are popping up to support them outside of the realm of the neighborhood hobby shop.  More options will appear as the UAV world matures.  Right now, we are just babies with this technology.

Saturday, September 5, 2015

Choosing the right UAV Part II: The Kodo


Many, if not most, of today’s modern consumer and prosumer UAV products offer many automated features such as automatic return to home as well as many other “fly for you” features.  While these features make flying the UAV easier for the novice, they are of no use in the event that the UAV loses it’s automated nav systems (GPS etc).

In that scenario, you are going to have to fly the UAV.  To do so requires skill.  It requires practice.  It is NOT easy.  But anyone willing to put in the time will acquire them.  The ability to control your UAV is key to using one legally and successfully.

You should be able to do the following:

  • Hover within a 3’ radius with consistent altitude.
  • Hop back and forth between 2 locations on the ground.  Forward and backwards.
  • Understand your spatial relationship to the drone (more on this in a bit).
  • Be able to fly the drone with the controls reversed.

Once you have these skills, you will be ready to take on most emergencies where the operator must take control and fly the UAV.

So, to that end, I purchased a Dromida Kodo.  It was $60 for the Kodo and I purchased 3 additional batteries for it.  I chose the Kodo because:

  • It's cheap.
  • 3-axis.  It will not hover on its own like 6 axis making it harder to fly.
  • Replaceable battery (did not want one with just 1 battery, unremovable).
  • SUPER tough.
  • Comes with EVERYTHING you need.

As an added bonus it has a little camera and comes with a 2GB Micro SD as well as a little USB card reader for it.  The video quality is standard definition and is really just for amusement purposes only.  You will not shoot anything useful with this thing, heh.


I have attempted to treat the Kodo just as if it was a full, professional UAV. And, just like a professional UAV, it uses Lithium Polymer batteries.  Do yourself a favor and read up on these batteries.  They are, most likely, unlike any rechargeable battery that you have used before.

Some of them require deep cycling and none of them can be discharged completely.  So make sure you understand these!

These small quads all use the LiPo style battery and they all seem to use the same connector as well.  The connector can be very difficult to pull apart so I ended up using a set of small needle nose pliers on the battery side of the connection to get the connectors separated.


I do a full pre-flight check with it just as you would with any aircraft.   For the Kodo, my checklist is this:

  • Check the weather.  Use common sense as to whether or not you should attempt flying.
  • Check the drone physically to ensure that there is no damage and the airframe is ready to fly.
  • Make sure all batteries are charged.  Inspect them for swelling and properly dispose of if so.
  • Make sure the transmitter has charged batteries and is functional and the throttle is at 0.

Make sure that when you power up your quad that you have it on a level surface to calibrate the gyros.  This is true for both 3 and 6 axis quads.

Once in my hot little hands, I charged up the batteries and tried to fly the thing in the house.  It was clearly evident after the first flight (if you can call getting it off of the ground and slamming into a wall a flight) that outside was the better choice.

These things are difficult to fly.  The Kodo has a beginner mode that it defaults to.  It’s hard.  I had a good 30 minutes of flight time with the Kodo before I was able to somewhat keep it from crashing for more than 30 seconds.

When I first started flying it, it was very discouraging.  But I knew it was a physical skill that is acquired through practice just as learning a musical instrument takes practice.

When you practice outside (I use the parking lot of a local park - small quads do not do well on grass.), be mindful of other people.  Whenever I was practicing I always chose a spot that isolated so as to minimize running into other people. And I mean that in the literal sense...

Whenever someone comes into your proximity and your practice quad, land it.  Crash land it.  Whatever.  Get it on the ground until the other person is gone.  If they stay, move to a new area.


While the Kodo is small, it can still cause injury and must be treated with respect.

I can offer the following tips now that I have been able to fly the thing (I consider flying for a full charge of the battery without touching the ground until I land in a controlled manner, flying):

Practice outside where there is minimal wind and LOTS of space.  If you are flying inside, there is the ceiling and walls and what have you that you must deal with. In the beginning, your focus needs to be just on flying the quad.

Once you are ready to apply throttle, do so VERY slowly and watch what way the quad wants to drift.  Trim out the drift and repeat until you are happy that the quad, generally, wants to rise up without too much drift.

Make SMALL adjustments.  It’s human nature to overcompensate when we react to the quad moving in a direction that we do not want.

RELAX.  Seriously.  Take a deep breath.  Let your arms relax as you fly.

Keep the quad at least 10 in front of you.  If it is too close, you risk flying it into yourself.  If it gets too close to you, your focus will be on avoiding the quad instead of flying it.


If you feel yourself getting frustrated and or angry, stop flying.  It takes patience to learn it.  Give yourself that patience.  I had at least 30 minutes of flight time before I was able to get out of the constant fly/crash cycle.

Make sure you understand the orientation of the quad in relation to yourself on the ground.  If the quad is facing you, the controls will be reversed.  Keeping the quad within your line of sight is crucial.  If you cannot see it, you cannot know what direction it faces...

If you want to do a pirouette with the yaw control, do NOT move your directional stick.  The quad will, most likely, not be facing away from you when you use the directional stick and the quad will move in an unexpected direction.


To maintain altitude, you must be constantly adjusting the throttle.  You will be constantly adjusting direction and throttle just to keep a constant hover.  If you look at folks flying a small quad like this on youtube you will see them "bounce" it off of the ground.

That happens because they dropped the throttle too quickly, realized the quad was dropping and attempted to add throttle but by that time they (and you and I) are too late and the quad hits the ground and then flies back up.

The quad needs a little time to fully react to the commands it receives and you will get a feel for this as you practice.

And, finally, put your phone number or something on your quad so that in the event you lose it, you might get it back.  If it's your pro UAV, you might consider a reward for it's return as well.

In part 3, we will wrap up the practice UAV adventures and talk about the selection of the final UAV(s) that we will ultimately use in the business and talk a bit about liability.

Tuesday, September 1, 2015

Choosing the right UAV


It's important to determine exactly what your needs will be in terms of purchasing a UAV.  Again it comes back to the mantra of "State your goal".  So here is mine:

Provide customers with a service that includes the ability to capture aerial footage.


Simple.  Many UAV enthusiasts prefer to build their own UAV and in doing so they have a deep knowledge of how the UAV works.  The theory being that since you built it, you can fix it in the field.  I have neither the desire nor inclination to do this.  I will be buying what is known as an RTF UAV or Ready To Fly UAV.

We own a number of different cameras but we are disinclined to use them in conjunction with a UAV for a number of reasons:

  • The weight of these cameras requires the use of a large (expensive) hexacopter.
  • In the event of a crash, I will be replacing an expensive camera and repairing an expensive UAV.
  • The quality of the image produced by these cameras far exceeds the needs for web publishing.

Now, while there are a number of UAVs on the market that require a minimum of pilot skills and automate much of the flying for you, most forums out there highly recommend buying a small toy UAV first and use it to learn to fly with.

  • The toy will be much harder to fly than the RTF UAV and will give you actual flying skills.
  • The toy can crash and survive.
  • The toy is a very low risk UAV (if you fly it into your head you won't be going to the hospital).
  • If you destroy it, it's so cheap you just buy another one.

OK, step one is to buy a cheap toy UAV and  practice with it.  But, new toy lust also makes me want to define my ultimate purchase for this.  Since the UAV we will purchase is only for filming, we want one with a good camera that we can control the settings for as well as a good UAV that is well supported.

So, for more specific criteria:

  • Good camera with excellent gimbal - 4K would be nice.
  • Camera must have minimal barrel distortion (the super wide angle curvy looking image)
  • Reliable
  • Ability to control ISO, aperture and frame rate.
  • Ability to have unobstructed 360 degree view with the camera (requires landing gear retraction).
  • Ability to have 2 operators: Pilot and camera operator.
  • Ability to automate certain flight tasks (return to home, waypoint navigation etc.).
  • Ability to endure moderately windy conditions.

OK, we have criteria for the UAV, let's look at costs and how long it will take to pay for itself.

Before we look at any specific UAV, let's consider the financial implications of the purchase as a fixed asset for the business.

ROI or return on investment is something that is very important to consider whenever you purchase a tool or asset to support your business.  Obviously you want a tool that represents a positive cash flow to the business, pays for itself in a timely fashion.  Let's consider the following assumptions:

Aerial footage for a commercial or business profile represents a portion of the total video shot, not the entire video (generally).  As such, a lower fee will be collected for aerial since that represents just a portion of the full video.  For an ROI calculation I will put this number at $800.

Pure aerial videos.  These will be aerial tours of facilities such as gold courses, resorts or what have you where the final video is aerial in it's entirety.

Hybrid aerial / ground video that includes other services such as motion graphics, music, editing and possible voice over.  For an ROI calculation I will put this number at $3800.

The $3800 is based on our existing base package fee of $3000.  Add in aerial for $800.

After subtracting my labor and overhead costs, the UAV should net about $300 per gig.  We currently book about 3-5 gigs per month.  If I set a budget of say $5500 for the UAV (that includes the UAV, extra batteries, case and accessories), 

So we take the low end of the calculation for a worst case scenario.  If we do 3 gigs per month with aerial, that's $900 / Mo.  The UAV will pay for itself in approximately 10 months.  That's perfectly acceptable for my business model.

So, $5500 for the UAV in total costs, we can put together the following package that meets the majority of our criteria:

DJI Inspire 1 with dual controllers: $3399+254.92 local sales tax (purchasing from local dealer).
4 DJI TB48B batteries: $793.96+59.55 sales tax
Pelican style custom case: $469 - online, no tax
4 128GB micro SD cards: $320

That puts us right around $5296.43.
Add in insurance and we are right around the target of $5500.

This UAV comes closest to meeting all of our criteria and fits within our budget.  It's not perfect but closer than any of the others come.  Our concerns with it are these:

You cannot get parts
Service turnaround time from DJI averages 7 weeks.

If you crash, game over for at LEAST 7 weeks.

Insurance is a must (you can check out insurance that we found in Utah here): 
http://dronesetc.com/pages/accidental-damage-insurance

In part 2 of "Choosing the right UAV" we will talk about learning to fly as well as using a smaller camera UAV for training and as a possible backup UAV.