Thursday, December 31, 2015
DJI Go POI testing
Instead of the usual blog post, I have resorted to making a Vlog! Hope you enjoy!
Friday, December 18, 2015
Happy Holidays!

Tuesday, November 24, 2015
Phantom 3 Testing

Initial Testing and Battery Issues
So far, we have flown 15 times for a total of about 2 hours of flight time. All of these flights have been tests. Attempting to understand the camera as well as the flight characteristics of the quad. We have flown it in 4 areas. The local college, the edge of the city, a farm and a flying field.
After the initial testing using the 2 batteries that came with the Phantom, I made a point of signing up on Healthy Drones and uploading the flight logs to that location for parsing. Before I dive into what I found in the logs, let's look at how to get to the logs on an iOS device.
We use an Apple iPad Air II as the mobile device for the Phantom. Apple does not make it as simple as a file copy that Android does. To get the logs, you must run up iTunes on your computer. Here is a Youtube video that illustrates the process under Windows.
For the Mac, the process is the same except that the log files are in a sub-folder called FlightRecords. You will still use the "Save To" button to get at them. Once you have the files on your computer you can upload them to Healthy Drones for analysis, which is what we do. Every flight.
Another thing we do is that we run the batteries to 50% for the first 10 cycles. It has been said that this will extend the life of the battery. I have yet to finish a single battery for 10 flights. The battery that came with the Phantom has 6 charges on it now.
After the maiden flight, I uploaded the logs and noticed that the extra battery that came with the Phantom had 3 major voltage deviations. What is that, you say? Here is the description from Healthy Drones:
Major Deviations ©
Major deviation is when a cell differs more than 0.07v from the other cells.
Please note that normal batteries can have a few of these.
An abnormal battery will:
A) Have most of the major deviations in one cell
B) There will be multiple major deviations per minute, and more than 10 total
C) The deviations continue longer than 1 minute
If your battery shows all symptoms (example, another) then this is considered a more severe case of an inefficient battery and may impact the battery life.
If your battery has only 1-4 instances on the same cell, don't worry too much about it. If it has 5-10 instances - then continue to track and make sure it does not degrade:
So, when I checked this out, the main battery was fine. No deviations. The second battery had 3 deviations:
So, after doing a couple more flights and checking the logs, the major deviation never abated but instead increased massively. So we called up B&H where we bought it and asked for an RMA. Sadly, we were outside of the return window so B&H advised us to buy another new battery and return it with the old battery in the box.
Instead we opted to buy 3 batteries. One to replace the bad one and 2 more to extend flight time. I have flown the new batteries a few times and one of them has exhibited a couple of major deviations but I do not think they will be an issue.
I will be flying this afternoon using the 3 new batteries as well as tomorrow afternoon so I should get a good data sampling from those flights and we can confirm that the batteries are good. Or not :)
I will blog about those results soon. Until then, fly safe, fly legal but FLY!
Thursday, November 12, 2015
A quick word about safety
Just a quick note here. Remember, that even though you may think you are out in the middle of nowhere and no threat to anyone with your quad, low flying aircraft in rural areas can be brought down by a quadcopter impact.
Until next time. Fly safe, fly often, but FLY!
Until next time. Fly safe, fly often, but FLY!
Monday, November 9, 2015
Sky Pilot
LOTS of learning and flying
Well, a LOT has happened since my last posting here. In addition to the Kodo, the stable of fliers has expanded to include 2 Syma Toys quadcopters. I wanted something bigger than the Kodo so that I could see it up in the sky. The Kodo disappears at too low of an altitude for me. Speaking of the Kodo...
I am on my 3rd Kodo. The very first one I bought I took up too high and it vanished. - *poof* - The next Kodo developed brain damage after about 3 weeks of daily flights. Admittedly, I have crashed the Kodos pretty damn hard and frequently. The second Kodo decides it will do a hard roll right after about 30 seconds of flight. At that point its not controllable.
The 3rd Kodo is just basically worn out. It needs a new set of motors. I have them and I will get to putting them in when I have some time to break out the soldering iron. The behavior is that at full throttle, the Kodo is just inches off of the ground...
Two New Quads from Syma
I bought a Syma X5SC Explorer II ($40) and a Syma X8C Voyager ($80). These are both excellent little quadcopters for my practice purposes. The X5SC is black and the X8C is bright orange. As such, I have named them Black Betty and Pumpkin, respectively.They both offer the same features and have the same camera on them. A little 720p camera with bad quality. But then, I did not buy them for their cameras. I bought the 5C because of it's indoor flight abilities. Good for inclement weather when you cannot fly outside.
The 8C is about the same size as the Phantom 3 and is orange. VERY easy to see in the sky. I have been able to fly it higher than any other quad except the Phantom.

It's pretty hard to miss the 8C in the air and it's size allows it to tolerate windy conditions. Something neither the Kodo, nor the 5C can do. The 5C must be flown in total calm. I think it's flight software is buggy in this regard. No matter as I bought it for indoors.
The controllers for these are sized like the quads. The black one is smaller... That is the only difference between them. They both work on either quad. Sadly, the range on the black transmitter is garbage... The larger white transmitter that came with the 8C has great range though.
Initially I did not use the white transmitter and I was favoring the black one due to it's size and the fact that the battery door on the white transmitter could easily fall off. The black one was screwed down.
However, I flew the 5C initially and noticed the occasional weird command error. I would do a quick roll right and return to center to adjust a hover and the roll would not get cancelled so I would kill the throttle and then once it got closer I restored the throttle and the quad was fine.
When the same exact thing happened with the 8C, I knew it was a transmitter issue. I put some gaff tape on the battery door and sure enough, the quads behaved as they should.
Both of these quads are a blast to fly. I have tried to fly and practice every day and I continue to do that. Here is a little bit of footage of the 5C in my backyard.
So these two quads have been keeping me busy. I will put a montage of footage from them together soon and post it up.
The Phantom 3 Professional

Well, I took the Phantom 3 out for it's maiden flight. My wife could not come due to her ankle injury. It's amusing when you read forums about these things. Most people post to say they have experienced some kind of failure. A new owner or potential owner might chance upon these forums and conclude that the normal behavior of these devices is failure. Nothing could be further from the truth.
I spent a few weeks scouting locations for flying the Phantom and, for that matter, the other quads as well. My wife recently upgraded her iPhone from a 4S to a 6S+. We also pickup up a new iPad Air II. For the initial flights, I used my iPad Air (first gen) and it worked perfectly.
The local college has proven to be an interesting location and generally deserted at daybreak. I also found a vacant field adjacent to a commercial property that has been for lease for the last year or so. I flew the maiden voyage at the field at dusk.
The local college has proven to be an interesting location and generally deserted at daybreak. I also found a vacant field adjacent to a commercial property that has been for lease for the last year or so. I flew the maiden voyage at the field at dusk.
For the follow up flight, I wanted some more varied and interesting scenery. For that I went over to the local college at daybreak. I always prefer the light at sunrise and sunset. The middle of the day has such a flat look to it. I prefer the warmer colors and dramatic shadows.
Trimming your Transmitter
I thought I would close out with a little tip. I was thinking about what I had learned over the past few months and what I determined was that when you are trimming out, you need to account for inertia. And what I mean by that is this:
Let's say you are trimming roll. The quad is drifting to the left. You trim it out a few clicks but it's still rolling left. Some of that is caused my the inertia of the quad's drift. Roll the quad back to the right a little to kill the inertia. If it still drifts, you still need to trim. But maybe not as much as you thought :)
Stay safe and fly safe!
Tuesday, October 13, 2015
Life is what happens to you while you're busy making other plans

So, we were supposed to have our maiden flight of the Phantom this past weekend but we did not do it due primarily to the weather and geomagnetic storm interference. The heat here was pretty brutal hitting 106 at my house and 109 at the beach.
Another consideration was geomagnetic interference caused by geomagnetic storms. The definition of this from Science Daily is this:
A geomagnetic storm is a temporary disturbance of the Earth's magnetosphere.
Associated with solar coronal mass ejections, coronal holes, or solar flares, a geomagnetic storm is caused by a solar wind shock wave which typically strikes the Earth's magnetic field 24 to 36 hours after the event.
The Kp-index
The Kp-index is the global geomagnetic storm index and is based on 3 hour measurements of the K-indices, for a given value, for each of the past days. The K-index itself is a three hour long quasi-logarithmic local index of the geomagnetic activity, relative to a calm day curve for the given location. The Kp-index measures the deviation of the most disturbed horizontal component of the magnetic field on fixed stations worldwide with their own local K-index. The global Kp-index is then determined with an algorithm that puts the averages of every station together. The result is the global Kp-index. The Kp-index ranges from 0 to 9 where a value of 0 means that there is very little geomagnetic activity and a value of 9 means extreme geomagnetic storming.
A value of 3 or less is considered safe by the more psychotic pilots while it is generally considered safe to fly the Phantom with a KP value of 6 or less. How do you find out what the KP value is for a given day? There is a nice website and some apps:
http://uavforecast.com
http://www.hoverapp.io/
We use both the web site and the free hover app (available on iOS and Android platforms). So a combination of both high KP index and raging heat has kept us from flying. This week it is much cooler but we are booked to shoot a bunch of interviews this week for a documentary.
In Other News
I thought I would go over what we ended up buying for the Phantom. The initial purchase consisted of:
- Phantom 3 Professional
- DJI Backpack case
- 2 extra props
- 1 extra battery
- 1 extra charger
- DJI brand prop guards
Following that, we purchased a nice gimbal clamp, a gimbal protector and the Strong Arms product from UAV Bits. I highly recommend these guys. They are super responsive, the product is excellent and reasonably priced.
We also purchased a soft case for the Phantom that allows storage / transport with the prop guards attached. And, finally, an iPad Air II to use as the main mobile device for the Phantom. My wife will also use the Air II until the iPad Pro comes out as she has targeted that as her next mobile device.
Kodo News
The old Kodo's main board seems to have bitten the dust. The symptoms that the Kodo is exhibiting is that after I get it up in the air and trimmed and stable, it will fly to the left as though the roll control was pegged to the left.
I looked up the price of a new main board for the Kodo and it's $18. To install it would require a complete disassembly of the Kodo, un soldering the motors and camera assembly and then re-installing all of that onto the new board. A new Kodo is $60.
I bought a new one...
I have to say, the new one rocks. It's much more stable than the old one. One of the things I practice is nose in hover and reverse return to me exercises and I was able to have much greater success with those using this new Kodo.
The New Plan, Stan
The current plan is to fly on Saturday. So, barring any unforeseen interference, I should have footage to post to the blog here come Sunday. So keep an eye out for that!
Until next time, fly safe!
Wednesday, September 30, 2015
Death of the Kodo, acquisition of the DJI Phantom 3 Professional and other news
The Kodo’s Status
I have been flying the Kodo every day to practice. During the week I practice at sunset and on weekends I try to practice at sunrise and sunset to get 2 sessions of practice for the day. As with anything of this nature, practice makes perfect and that is true here.
I have been getting better with it. Hover is no issue. I can fly the quad around a bit and generally
stay in control. I do not feel like the
quad gets away from me (as in I cut the throttle because it’s no longer
controllable by me).
My training regimen consists of the following (I break down
the exercises by battery):
- 1st battery: Warmup and basic hover practice
- 2nd battery: Hop between 2 spots on the ground about 15’ apart
- 3rd battery: practice 10:00 and 2:00 hover*
- 4th battery: practice 10:00 and 2:00 hover*
- 5th battery: Have some fun
*3rd and 4th batteries are used to
hover the quad while the front of the quad is aimed at the 10:00 angle and 2:00
angle. Once I have those mastered, I
will move on to a 9:00/3:00 angle and after that I will move to nose in
hovering (quad is facing me, controls are reversed).
Ultimately, I will be happy when I can do a nose-in hover
with ease as well as fly in a circle and a figure 8. That is the goal.
In other Kodo news, I have been using my GoPro to record my
sessions with the Kodo. I will cut
together some of that and post it up here so you can see my pathetic attempts
at flying. This past weekend, while
flying the Kodo in the backyard, the Kodo decided to take off on its own and it
slammed into a wall behind me as I was flying it.
I thought it was odd and that maybe there was some RF interference
that caused it to do that so I moved to the other side of the yard. I flew for a few minutes before the Kodo
decided to slam into my shin and cut me.
Again I dusted it off and flew for a little while without incident.
On the last battery, the Kodo flew for about 2 minutes and
then I landed it. Attempting to take off
again failed as the left front motor died.
I attributed the the odd flight characteristics exhibited by the Kodo
previously to this motor failure and indeed the GoPro footage confirmed this.
We ordered a new motor on Amazon for it (they come in pairs
for about $10) and I will replace the dead one once the new one arrives.
So, sadly, no more Kodo practice until I get my new
motor. Guess I will have to play with the
P3P then…
The Phantom 3 Professional
We had the P3P for a little over a week before we actually got around to unboxing it and setting it up. The boxes that it shipped in were pretty beat up by UPS but nothing inside was damaged.
Speaking of, it seems like UPS’s disrespect for packages has
increased of late. Was a time when most
packages were intact. Now I do not
remember the last time that happened…
We only have 1 device that will run the DJI Phantom app (the
GO app) and that is my iPad Air (first gen).
My wife is considering a new iPhone 6s+ or an iPad Air II so we will be
able to use those as well.
We charged up the batteries and the remote, installed the
app and attempted to power the rig up.
We turned the remote on first with the iPad (ALWAYS turn the remote on
first (and LAST) – If you power up the quad first, it may think it has lost
connection to the remote and attempt to do a return to home – to whatever its
last home point was…).
Once all of that was up and running and the app was talking
to the remote, we removed the quad’s camera gimbal clamp and powered up the quad
(sans props of course) which emitted a rather loud set of musical tones. When the app started talking to the quad and
displaying its camera feed, we noticed that it reported a gimbal error and that
it wanted to have its firmware updated.
The gimbal error was a bit dismaying but after a bit of
online research, some folks indicated that the gimbal could report a false
error with certain firmware versions. So
the first task was to update the firmware.
Updating the Firmware
This was a pretty painless process. I downloaded the latest firmware from DJI,
copied the .BIN file to the microSD card, inserted the card into the P3P and
powered it up. This is the ONLY instance
where you can power up this quad without the remote being turned on first.
The P3P took about 25 minutes to perform the update and
during that time emitted a constant beeping sound. I expected this after reading up on it online
so I put it in the bathroom expecting it to be as loud as the startup sounds
but that was not the case. The beeping
was pretty quiet after all but I left it in the bathroom with the door open so
I could hear the louder beeps it might make.
Following the P3P’s update, I attempted to update the remote
control. As it turned out, there was no update
for the remote in the update file that I used for the P3P. It turns out that I had to download the
previous firmware file and it had the update so we were able to update the
remote with no issues The remote took
about 10 minutes to perform the firmware update.
The final status
Once updated, the app no longer complained about a gimbal
error. YAY! However I was not convinced that the gimbal
was 100%. I noticed it twitching left
and right when the P3P was just sitting idle. I decided to pick up the P3P and walk around
the house with it while recording.
When I reviewed that footage, the image was very shaky and
unstable. I was very disappointed but
thought that maybe when the P3P is in flight that the gimbal would just work. However, it turns out that there is yet
another bit of packing material that is wedged behind the gimbal for shipping
purposes.

Once I removed it, the gimbal worked perfectly. No twitching while it is idle and walking
through the house with it looked smoother than a Steadicam shot. Excellent.
Once all of that was resolved, both my wife and I were able
to make good use of the simulator. My
initial practicing involved getting the quad to fly in a circle with combined
rudder/yaw. I think it will help a lot
with this coordinated skill. I started
by applying 100% rudder (roll) so the quad would spin in place and then slowly
started adding in YAW, the effect being that as I added more and more YAW, the
size of the circle increased. Still a
lot of practice to do on that.
We have not flown the P3P yet as we are still waiting for
the Strong Arm reinforcements. And, with
that, we may have run into a small snag.
We plan to use the Strong Arms with a set of Bestem quick release prop
guards. We need the quick release so
that we can use the backpack case. The
Strong Arm product supports being used in conjunction with the Bestem guards
but we need to understand how much we will need to modify the backpack case’s
foam to accommodate this.
In the next installment, I will have actual footage from our
maiden flight so stay tuned!
Saturday, September 12, 2015
Flying Small Objects
We had a family emergency this past week and that put things on hold for a bit. In the mean time I have practiced more with the Kodo and my latest efforts are above. Such as they are.
Our Phantom 3 Professional will be here next Thursday the 17th. It will be a few weeks before we take it out to fly. The reason for the delay is that we do not want to fly the drone before we can put both strong arms and prop guards.
Strong Arms
Strong Arm is a product that is intended to overcome a design flaw in the shell of the phantom. The plastic around the screws where the motors are affixed can become cracked from the stress of the brushless motor. This issue is very widely reported. Some have reported it after as few as 12 flights.
These cracks can allow the motor to separate from the shell and then a lovely crash ensues.
A company in Texas makes a reenforcement plate for the Phantom that overcomes the issue called Strong Arm. I am not going to risk a single flight without using those. Unfortunately, the current version precludes the use of prop guards and, as a beginner, I want prop guards on my flying lawnmower.
So, that is where we are at. If you are bored, DJI announced a new camera for the Inspire 1 and you can read all about it here.
Next post I will have some thoughts on the new Inspire camera. Until then, fly safe, fly legal, but fly!
Sunday, September 6, 2015
Choosing the Right UAV Part III: Conclusion
Kodo Wrap Up
After about 3 hours of flight time, I was confident with the Kodo in beginner mode. I was able to immediately take off and maintain a decent hover. Every time I crashed it was due to making adjustments that were too extreme mainly due to panic on my part.
In this video, I recorded a little footage using the Kodo’s built in camera.
As you can see, it’s really just for personal amusement and nothing more. Sadly, the microSD card that came with the Kodo was defective and after a couple of uses became unusable resulting in about 30 minutes of lost video. Be thankful I lost that video and did not include it above. :)
Another hour or so of flight time spent flying the quad backwards (facing me) was very useful and helped if I wanted to change the direction of the quad and maintain control.
The Kodo has been a great learning tool and will continue to be so as I will use it to practice with instead of practicing with the larger Quads. And speaking of larger quads, it’s time to talk about what we have settled on with regard to a production grade quad that will fly a gimbal mounted HD or better camera.
The DJI Way and managing the pilot’s risks

After a great deal of research, we have concluded that, ultimately, the DJI Inspire 1 will be our UAV of choice for production. As noted in part one of this series of blog posts, we have calculated the cost of investment and ROI.
What I have not spoken about much yet is risk. And there are a wide variety of risks associated with this type of work including, but not limited to:
- You book a gig to shoot aerial. Either before the gig or during the gig you crash the UAV or suffer some other form of catastrophic failure. Goodbye gig unless you have a backup.
- You crash the UAV and cause damage to other persons and or property. This can happen even with the best pilots. The UAV can have a failure in flight and go out of control. The pilot can make a mistake.
Let’s talk about the first one there. In an effort to provide us with a backup system to the Inspire one, we have identified the DJI Phantom 3 Professional (P3P) as a viable backup platform. The P3P has the same camera as the Inspire 1 so the footage will match. It lacks the stability and much of the capability of the Inspire but it offers these advantages beyond matching the camera:
- It’s relatively inexpensive: $1259
- It can withstand more of a physical impact than the Inspire
- It’s easier to repair than the Inspire 1.

This will be our first purchase. We will order the following:
- DJI Phantom 3 Professional
- 1 extra battery
- Prop guards
- Case
We are getting this case:
Which is a generic version of the same DJI case that goes for $150.
Depending on when we take delivery, best case we will do a maiden flight with it around the weekend of the 12th. I will, of course post following that flight.
Now, on to the second item there.
Insurance
Ya gotta have it. You will need to extend your business liability insurance in the event that you damage property or injure someone while in the course of filming with your UAV.
If you do NOT intend to use your UAV for business, you can get insurance by joining the AMA. It’s the most reasonable price you will find for this kind of insurance.
Regardless of your use, everyone needs damage insurance for their UAV. Our research has identified only ONE underwriter of this type of insurance:
Looks like really nice coverage. We are early in the development of both UAVs and the cottage industries that are popping up to support them outside of the realm of the neighborhood hobby shop. More options will appear as the UAV world matures. Right now, we are just babies with this technology.
Saturday, September 5, 2015
Choosing the right UAV Part II: The Kodo

Many, if not most, of today’s modern consumer and prosumer UAV products offer many automated features such as automatic return to home as well as many other “fly for you” features. While these features make flying the UAV easier for the novice, they are of no use in the event that the UAV loses it’s automated nav systems (GPS etc).
In that scenario, you are going to have to fly the UAV. To do so requires skill. It requires practice. It is NOT easy. But anyone willing to put in the time will acquire them. The ability to control your UAV is key to using one legally and successfully.
You should be able to do the following:
- Hover within a 3’ radius with consistent altitude.
- Hop back and forth between 2 locations on the ground. Forward and backwards.
- Understand your spatial relationship to the drone (more on this in a bit).
- Be able to fly the drone with the controls reversed.
Once you have these skills, you will be ready to take on most emergencies where the operator must take control and fly the UAV.
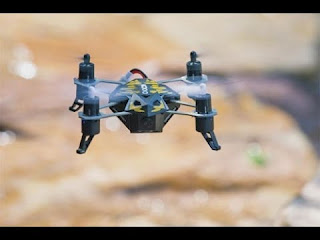
So, to that end, I purchased a Dromida Kodo. It was $60 for the Kodo and I purchased 3 additional batteries for it. I chose the Kodo because:
- It's cheap.
- 3-axis. It will not hover on its own like 6 axis making it harder to fly.
- Replaceable battery (did not want one with just 1 battery, unremovable).
- SUPER tough.
- Comes with EVERYTHING you need.
As an added bonus it has a little camera and comes with a 2GB Micro SD as well as a little USB card reader for it. The video quality is standard definition and is really just for amusement purposes only. You will not shoot anything useful with this thing, heh.

I have attempted to treat the Kodo just as if it was a full, professional UAV. And, just like a professional UAV, it uses Lithium Polymer batteries. Do yourself a favor and read up on these batteries. They are, most likely, unlike any rechargeable battery that you have used before.
Some of them require deep cycling and none of them can be discharged completely. So make sure you understand these!
These small quads all use the LiPo style battery and they all seem to use the same connector as well. The connector can be very difficult to pull apart so I ended up using a set of small needle nose pliers on the battery side of the connection to get the connectors separated.

These small quads all use the LiPo style battery and they all seem to use the same connector as well. The connector can be very difficult to pull apart so I ended up using a set of small needle nose pliers on the battery side of the connection to get the connectors separated.

I do a full pre-flight check with it just as you would with any aircraft. For the Kodo, my checklist is this:
- Check the weather. Use common sense as to whether or not you should attempt flying.
- Check the drone physically to ensure that there is no damage and the airframe is ready to fly.
- Make sure all batteries are charged. Inspect them for swelling and properly dispose of if so.
- Make sure the transmitter has charged batteries and is functional and the throttle is at 0.
Make sure that when you power up your quad that you have it on a level surface to calibrate the gyros. This is true for both 3 and 6 axis quads.
Once in my hot little hands, I charged up the batteries and tried to fly the thing in the house. It was clearly evident after the first flight (if you can call getting it off of the ground and slamming into a wall a flight) that outside was the better choice.
These things are difficult to fly. The Kodo has a beginner mode that it defaults to. It’s hard. I had a good 30 minutes of flight time with the Kodo before I was able to somewhat keep it from crashing for more than 30 seconds.
When I first started flying it, it was very discouraging. But I knew it was a physical skill that is acquired through practice just as learning a musical instrument takes practice.
When you practice outside (I use the parking lot of a local park - small quads do not do well on grass.), be mindful of other people. Whenever I was practicing I always chose a spot that isolated so as to minimize running into other people. And I mean that in the literal sense...
Whenever someone comes into your proximity and your practice quad, land it. Crash land it. Whatever. Get it on the ground until the other person is gone. If they stay, move to a new area.


While the Kodo is small, it can still cause injury and must be treated with respect.
I can offer the following tips now that I have been able to fly the thing (I consider flying for a full charge of the battery without touching the ground until I land in a controlled manner, flying):
Practice outside where there is minimal wind and LOTS of space. If you are flying inside, there is the ceiling and walls and what have you that you must deal with. In the beginning, your focus needs to be just on flying the quad.
Once you are ready to apply throttle, do so VERY slowly and watch what way the quad wants to drift. Trim out the drift and repeat until you are happy that the quad, generally, wants to rise up without too much drift.
Once you are ready to apply throttle, do so VERY slowly and watch what way the quad wants to drift. Trim out the drift and repeat until you are happy that the quad, generally, wants to rise up without too much drift.
Make SMALL adjustments. It’s human nature to overcompensate when we react to the quad moving in a direction that we do not want.
RELAX. Seriously. Take a deep breath. Let your arms relax as you fly.
Keep the quad at least 10 in front of you. If it is too close, you risk flying it into yourself. If it gets too close to you, your focus will be on avoiding the quad instead of flying it.

If you feel yourself getting frustrated and or angry, stop flying. It takes patience to learn it. Give yourself that patience. I had at least 30 minutes of flight time before I was able to get out of the constant fly/crash cycle.
Make sure you understand the orientation of the quad in relation to yourself on the ground. If the quad is facing you, the controls will be reversed. Keeping the quad within your line of sight is crucial. If you cannot see it, you cannot know what direction it faces...
If you want to do a pirouette with the yaw control, do NOT move your directional stick. The quad will, most likely, not be facing away from you when you use the directional stick and the quad will move in an unexpected direction.

To maintain altitude, you must be constantly adjusting the throttle. You will be constantly adjusting direction and throttle just to keep a constant hover. If you look at folks flying a small quad like this on youtube you will see them "bounce" it off of the ground.
That happens because they dropped the throttle too quickly, realized the quad was dropping and attempted to add throttle but by that time they (and you and I) are too late and the quad hits the ground and then flies back up.
The quad needs a little time to fully react to the commands it receives and you will get a feel for this as you practice.
And, finally, put your phone number or something on your quad so that in the event you lose it, you might get it back. If it's your pro UAV, you might consider a reward for it's return as well.
In part 3, we will wrap up the practice UAV adventures and talk about the selection of the final UAV(s) that we will ultimately use in the business and talk a bit about liability.
Tuesday, September 1, 2015
Choosing the right UAV

It's important to determine exactly what your needs will be in terms of purchasing a UAV. Again it comes back to the mantra of "State your goal". So here is mine:
Provide customers with a service that includes the ability to capture aerial footage.
Simple. Many UAV enthusiasts prefer to build their own UAV and in doing so they have a deep knowledge of how the UAV works. The theory being that since you built it, you can fix it in the field. I have neither the desire nor inclination to do this. I will be buying what is known as an RTF UAV or Ready To Fly UAV.
We own a number of different cameras but we are disinclined to use them in conjunction with a UAV for a number of reasons:
- The weight of these cameras requires the use of a large (expensive) hexacopter.
- In the event of a crash, I will be replacing an expensive camera and repairing an expensive UAV.
- The quality of the image produced by these cameras far exceeds the needs for web publishing.
Now, while there are a number of UAVs on the market that require a minimum of pilot skills and automate much of the flying for you, most forums out there highly recommend buying a small toy UAV first and use it to learn to fly with.
- The toy will be much harder to fly than the RTF UAV and will give you actual flying skills.
- The toy can crash and survive.
- The toy is a very low risk UAV (if you fly it into your head you won't be going to the hospital).
- If you destroy it, it's so cheap you just buy another one.
OK, step one is to buy a cheap toy UAV and practice with it. But, new toy lust also makes me want to define my ultimate purchase for this. Since the UAV we will purchase is only for filming, we want one with a good camera that we can control the settings for as well as a good UAV that is well supported.
So, for more specific criteria:
- Good camera with excellent gimbal - 4K would be nice.
- Camera must have minimal barrel distortion (the super wide angle curvy looking image)
- Reliable
- Ability to control ISO, aperture and frame rate.
- Ability to have unobstructed 360 degree view with the camera (requires landing gear retraction).
- Ability to have 2 operators: Pilot and camera operator.
- Ability to automate certain flight tasks (return to home, waypoint navigation etc.).
- Ability to endure moderately windy conditions.
OK, we have criteria for the UAV, let's look at costs and how long it will take to pay for itself.
Before we look at any specific UAV, let's consider the financial implications of the purchase as a fixed asset for the business.
ROI or return on investment is something that is very important to consider whenever you purchase a tool or asset to support your business. Obviously you want a tool that represents a positive cash flow to the business, pays for itself in a timely fashion. Let's consider the following assumptions:
Aerial footage for a commercial or business profile represents a portion of the total video shot, not the entire video (generally). As such, a lower fee will be collected for aerial since that represents just a portion of the full video. For an ROI calculation I will put this number at $800.
Pure aerial videos. These will be aerial tours of facilities such as gold courses, resorts or what have you where the final video is aerial in it's entirety.
Hybrid aerial / ground video that includes other services such as motion graphics, music, editing and possible voice over. For an ROI calculation I will put this number at $3800.
The $3800 is based on our existing base package fee of $3000. Add in aerial for $800.
After subtracting my labor and overhead costs, the UAV should net about $300 per gig. We currently book about 3-5 gigs per month. If I set a budget of say $5500 for the UAV (that includes the UAV, extra batteries, case and accessories),
So we take the low end of the calculation for a worst case scenario. If we do 3 gigs per month with aerial, that's $900 / Mo. The UAV will pay for itself in approximately 10 months. That's perfectly acceptable for my business model.
So, $5500 for the UAV in total costs, we can put together the following package that meets the majority of our criteria:
DJI Inspire 1 with dual controllers: $3399+254.92 local sales tax (purchasing from local dealer).
4 DJI TB48B batteries: $793.96+59.55 sales tax
Pelican style custom case: $469 - online, no tax
4 128GB micro SD cards: $320
That puts us right around $5296.43.
Add in insurance and we are right around the target of $5500.
This UAV comes closest to meeting all of our criteria and fits within our budget. It's not perfect but closer than any of the others come. Our concerns with it are these:
You cannot get parts
Service turnaround time from DJI averages 7 weeks.
If you crash, game over for at LEAST 7 weeks.
Insurance is a must (you can check out insurance that we found in Utah here):
http://dronesetc.com/pages/accidental-damage-insurance
In part 2 of "Choosing the right UAV" we will talk about learning to fly as well as using a smaller camera UAV for training and as a possible backup UAV.
Monday, August 31, 2015
Analysis Paralysis
Whenever I approach a new topic that I have no experience with previously, I tend to research it carefully. Certainly the world of UAVs demands that you educate yourself and act responsibly. The majority of UAV crashes and incidents can be attributed to pilot error.
I try to understand as much of the underlying technology as I can to create a good knowledge base from which to work.
So, in an effort to educate myself on this topic and discipline, I have used 2 resources:
The internet
A local UAV retailer
First up is the internet. Everything you need to know is out there. You just need to separate the wheat from the chaff. With that in mind, I offer these found resources that were very useful in my research.
Let's start at the beginning. How does a helicopter work?
https://www.youtube.com/watch?v=WdEWzqsfeHM&list=PLNbXXMoWfR3Bf7Z77vcviPlkHtTXUlEpC
Here is an excellent series on flying a model helicopter:
https://www.youtube.com/watch?v=yeUTh3iWRec
OK, now let's get quad specific...
Quad flight school:
http://quadcopter101.blogspot.com/2013/10/chapter-1-introduction-to-quadcopters.html
Lessons and resources:
http://myfirstdrone.com/
http://www.phreakmonkey.com/2014/12/beginners-guide-to-flying-quadcopter.html
http://www.dronethusiast.com/quadcopter-beginners-guide-learn-to-fly-drones/
http://www.tested.com/art/makers/459457-joining-quad-squad-how-get-started-rc-quadcopters/
http://www.realflight.com/basic/basic-aircraft.html
http://www.inspirepilots.com/threads/understanding-compass-and-magnetic-fields.3742/
LiPo (the battery of choice for the R/C world):
http://multirotorforums.com/threads/understanding-lithium-polymer-batteries.12072/
And, while this might be a bit pre-mature for you, here is a set of pre-flight checklists for the DJI Inspire:
http://www.dronefrontier.com/inspire1checklist
http://www.inspirepilots.com/resources/categories/dji-inspire-1-downloads.1/
MY NOTE:
Quad calibrations should be done away from:
Any metal objects (fence, car etc)
Do not wear a watch
Do not do around cell phone
A final note - check your surroundings for power lines/ cell towers or any other items that might be an issue
----------------------------------------------------------------------------------------------------------
Make Sure Batteries Are Fully Charged in Both TX and A/C
Verify Mode P/A/F
Put phone and tablet in flight mode
Power On TX
Power On A/C
Load DJI App
Exit Storage Mode via the app
Power Off A/C
Attach Camera
Check memory card is inside the camera
Install Props & Prop locks when we get them.
If winter set outside for a few minutes to get Acculamated to Temp.
Power On A/C
Check For cleanest Channel?????
Calibrate Compass
Check IMU Calibration .99 - 1.01
Set Fail Safe Height
Set RTH For A/C or TX
Point Antennas Correctly on TX
Power up motors if in winter to allow motors to warm up for a minute or so.
Then enjoy your flight
----------------------------------------------------------------------------------------------------------
PRE-LOCATION
• Batteries / tablet charged
• Firmware current
• Calibrate RC
• Confirm desired RC mode
• Memory card cleared
ON LOCATION
• Disable wifi on tab and airplane mode phones
• Prop locks / tighten props
• Calibrate your compass
• Calibrate your IMU (if readings are off)
• Give GPS a moment to lock in
• Properly position antenna
• Confirm RTH settings
• Confirm fail safe height
• Liftoff to 2-3 ft and watch behavior (steady, or drifting)
MISC
• Camera settings
• Check weather
• Plan flight route
• Be aware of surroundings.
• Allow unit to acclimate, then motors to warmup (cold weather)
• Always be prepared GPS loss
• Stay within line of sight
----------------------------------------------------------------------------------------------------------
Weather:
Wind below 20mph?
If below 40 F, use battery foam
Physical inspection:
SD card
Inspect bird and props
Install camera
Install props
Install prop locks
Prepare iPad:
Close all other apps
Open DJI Pilot
Cache maps for flight
Airplane Mode on
Verify TX switches:
Flight mode switch
Landing gear down
Power TX
Power aircraft:
Monitor status check and warm up LED indicators
Calibrate compass
Check IMU MOD levels:
Gyro: 0
Accel: .99-1.01
Comp: 1400-1600
When was last TX calibration?
Lift off to 6 ft hover:
Verify stable hover
Verify all controls are responsive
Landing gear up
----------------------------------------------------------------------------------------------------------
PRE FLIGHT CHECK LIST
1______CHOSE A GOOD TAKE-OFF LANDING PLACE
2______CHECK PROPS
3______CHECK CAMERA FILTER
4______TURN ON REMOTE CONTROL - APP TURNS ON
5______CHECK TABLET BATTERY LEVEL
6______TURN ON AIRPLANE MODE ON TABLET / CONFIRM
7______FLIGHT MODE SWITCH IN P POSITION ON REMOTE ( P - ATTI)
8______TURN ON INSPIRE
9______TURN ON PILOT APP – CONFIRM BASICS ON SCREEN
_______FLIGHT MODE (P-ATTI)
_______AIRCRAFT BATTERY CHARGED
_______RC BATTERY CHARGED
10______CALIBRATE COMPASS
11______CONFIRM GPS CONTROL
_______APP SCREEN - SATELLITE BARS FULL
_______APP SCREEN – SAFE TO FLY (GPS CONTROL)
_______INSPIRE REAR LIGHT BLINKING GREEN
12______CONFIRM GIMBAL MODE ON APP (FOLLOW, for me)
13______MAP CHECK – AIRPLANE ICON AT HOME BASE?
14______CHECK AND CONFIRM CAMERA SETTINGS
15______STAND BEHIND INSPIRE (this helps me)
16______TAKE OFF – HOVER – FINAL CHECK OF BATTERY LEVELS, GPS CONTROL
17______RAISE LANDING GEAR
18______FLY SAFELY, SHOOT. CONSTANT BATTERY CHECK – ALLOW TIME TO RETURN
----------------------------------------------------------------------------------------------------------
I try to understand as much of the underlying technology as I can to create a good knowledge base from which to work.
So, in an effort to educate myself on this topic and discipline, I have used 2 resources:
The internet
A local UAV retailer
First up is the internet. Everything you need to know is out there. You just need to separate the wheat from the chaff. With that in mind, I offer these found resources that were very useful in my research.
Let's start at the beginning. How does a helicopter work?
https://www.youtube.com/watch?v=WdEWzqsfeHM&list=PLNbXXMoWfR3Bf7Z77vcviPlkHtTXUlEpC
Here is an excellent series on flying a model helicopter:
https://www.youtube.com/watch?v=yeUTh3iWRec
OK, now let's get quad specific...
Quad flight school:
http://quadcopter101.blogspot.com/2013/10/chapter-1-introduction-to-quadcopters.html
Lessons and resources:
http://myfirstdrone.com/
http://www.phreakmonkey.com/2014/12/beginners-guide-to-flying-quadcopter.html
http://www.dronethusiast.com/quadcopter-beginners-guide-learn-to-fly-drones/
http://www.tested.com/art/makers/459457-joining-quad-squad-how-get-started-rc-quadcopters/
http://www.realflight.com/basic/basic-aircraft.html
http://www.inspirepilots.com/threads/understanding-compass-and-magnetic-fields.3742/
LiPo (the battery of choice for the R/C world):
http://multirotorforums.com/threads/understanding-lithium-polymer-batteries.12072/
General forums for reading and asking questions:
Forums:
And a couple of DJI Inspire 1 sites:
And, while this might be a bit pre-mature for you, here is a set of pre-flight checklists for the DJI Inspire:
http://www.dronefrontier.com/inspire1checklist
http://www.inspirepilots.com/resources/categories/dji-inspire-1-downloads.1/
MY NOTE:
Quad calibrations should be done away from:
Any metal objects (fence, car etc)
Do not wear a watch
Do not do around cell phone
A final note - check your surroundings for power lines/ cell towers or any other items that might be an issue
----------------------------------------------------------------------------------------------------------
Make Sure Batteries Are Fully Charged in Both TX and A/C
Verify Mode P/A/F
Put phone and tablet in flight mode
Power On TX
Power On A/C
Load DJI App
Exit Storage Mode via the app
Power Off A/C
Attach Camera
Check memory card is inside the camera
Install Props & Prop locks when we get them.
If winter set outside for a few minutes to get Acculamated to Temp.
Power On A/C
Check For cleanest Channel?????
Calibrate Compass
Check IMU Calibration .99 - 1.01
Set Fail Safe Height
Set RTH For A/C or TX
Point Antennas Correctly on TX
Power up motors if in winter to allow motors to warm up for a minute or so.
Then enjoy your flight
----------------------------------------------------------------------------------------------------------
PRE-LOCATION
• Batteries / tablet charged
• Firmware current
• Calibrate RC
• Confirm desired RC mode
• Memory card cleared
ON LOCATION
• Disable wifi on tab and airplane mode phones
• Prop locks / tighten props
• Calibrate your compass
• Calibrate your IMU (if readings are off)
• Give GPS a moment to lock in
• Properly position antenna
• Confirm RTH settings
• Confirm fail safe height
• Liftoff to 2-3 ft and watch behavior (steady, or drifting)
MISC
• Camera settings
• Check weather
• Plan flight route
• Be aware of surroundings.
• Allow unit to acclimate, then motors to warmup (cold weather)
• Always be prepared GPS loss
• Stay within line of sight
----------------------------------------------------------------------------------------------------------
Weather:
Wind below 20mph?
If below 40 F, use battery foam
Physical inspection:
SD card
Inspect bird and props
Install camera
Install props
Install prop locks
Prepare iPad:
Close all other apps
Open DJI Pilot
Cache maps for flight
Airplane Mode on
Verify TX switches:
Flight mode switch
Landing gear down
Power TX
Power aircraft:
Monitor status check and warm up LED indicators
Calibrate compass
Check IMU MOD levels:
Gyro: 0
Accel: .99-1.01
Comp: 1400-1600
When was last TX calibration?
Lift off to 6 ft hover:
Verify stable hover
Verify all controls are responsive
Landing gear up
----------------------------------------------------------------------------------------------------------
PRE FLIGHT CHECK LIST
1______CHOSE A GOOD TAKE-OFF LANDING PLACE
2______CHECK PROPS
3______CHECK CAMERA FILTER
4______TURN ON REMOTE CONTROL - APP TURNS ON
5______CHECK TABLET BATTERY LEVEL
6______TURN ON AIRPLANE MODE ON TABLET / CONFIRM
7______FLIGHT MODE SWITCH IN P POSITION ON REMOTE ( P - ATTI)
8______TURN ON INSPIRE
9______TURN ON PILOT APP – CONFIRM BASICS ON SCREEN
_______FLIGHT MODE (P-ATTI)
_______AIRCRAFT BATTERY CHARGED
_______RC BATTERY CHARGED
10______CALIBRATE COMPASS
11______CONFIRM GPS CONTROL
_______APP SCREEN - SATELLITE BARS FULL
_______APP SCREEN – SAFE TO FLY (GPS CONTROL)
_______INSPIRE REAR LIGHT BLINKING GREEN
12______CONFIRM GIMBAL MODE ON APP (FOLLOW, for me)
13______MAP CHECK – AIRPLANE ICON AT HOME BASE?
14______CHECK AND CONFIRM CAMERA SETTINGS
15______STAND BEHIND INSPIRE (this helps me)
16______TAKE OFF – HOVER – FINAL CHECK OF BATTERY LEVELS, GPS CONTROL
17______RAISE LANDING GEAR
18______FLY SAFELY, SHOOT. CONSTANT BATTERY CHECK – ALLOW TIME TO RETURN
----------------------------------------------------------------------------------------------------------
OK, in the next post I will talk specifically about my conclusions based on the research I have done as well as my experiences with a local UAV retailer.
Sunday, August 30, 2015
State your goal
State your goal is something I have said to clients that were struggling with what they think they need and get them focused on the desired end result instead of the process to get there.
The process to get there is my problem. I also use it on myself in an effort to simplify what I am trying to accomplish.
The goal for me here is to be able to do aerial coverage of farm, ranch and equestrian facilities as well as the odd golf course fly through tour...
With that in mind I put together a set of criteria and did some research as well as leveraging my own knowledge of video production techniques and content distribution.
I am also VERY aware of how dangerous any kind of helicopter type of vehicle is. Consider this:
Safety is of the utmost importance here. In order to be safe we have to educate ourselves on the topic at hand. Listen to the advice of the experts. Always act responsibly. Always be a positive ambassador to the UAV community at large.
If someone had been standing in front of that door when the UAV crashed, that person would have gone to the hospital. As a responsible UAV pilot we must all work towards never, ever placing someone at risk like this.
This means flying your UAV only in areas that are legal and safe. Sadly, the pilots that upload footage from a UAV taken over people on a beach or at a festival or anything of that nature is just downright irresponsible. Four or more spinning blades make for a nasty weapon should the UAV go out of control.
Within the current FAA rules, there is a section 333 that a professional user of UAV equipment will need to file an exemption for. I will talk about that process in a later post as I make application for the exemption. Currently, the FAA is a bit overwhelmed with requests for this so they are taking a while to process.
In the mean time, I have a lot to learn and a lot to cover.
In the next installment, I will talk about the different UAVs that were considered as well as our current front runner. The use of a mini-UAV to learn to fly will also be discussed. part of my goal here is convey my process to hopefully ease the pain for others that are considering this as a tool.
The process to get there is my problem. I also use it on myself in an effort to simplify what I am trying to accomplish.
The goal for me here is to be able to do aerial coverage of farm, ranch and equestrian facilities as well as the odd golf course fly through tour...
With that in mind I put together a set of criteria and did some research as well as leveraging my own knowledge of video production techniques and content distribution.
- Most of our work ends up on the web. That means we don't need to fly a RED or an Alexa.
- A hexacopter with gimbal and camera is about $13K+.
- A quadcopter with HD camera can be had from about $200+. The low end sans gimbal.
- Almost all quadcopters restrict a 360 degree view due to landing gear.
- Quadcopters with retractable landing gear are pricey.
I am also VERY aware of how dangerous any kind of helicopter type of vehicle is. Consider this:
Safety is of the utmost importance here. In order to be safe we have to educate ourselves on the topic at hand. Listen to the advice of the experts. Always act responsibly. Always be a positive ambassador to the UAV community at large.
If someone had been standing in front of that door when the UAV crashed, that person would have gone to the hospital. As a responsible UAV pilot we must all work towards never, ever placing someone at risk like this.
This means flying your UAV only in areas that are legal and safe. Sadly, the pilots that upload footage from a UAV taken over people on a beach or at a festival or anything of that nature is just downright irresponsible. Four or more spinning blades make for a nasty weapon should the UAV go out of control.
Within the current FAA rules, there is a section 333 that a professional user of UAV equipment will need to file an exemption for. I will talk about that process in a later post as I make application for the exemption. Currently, the FAA is a bit overwhelmed with requests for this so they are taking a while to process.
In the mean time, I have a lot to learn and a lot to cover.
In the next installment, I will talk about the different UAVs that were considered as well as our current front runner. The use of a mini-UAV to learn to fly will also be discussed. part of my goal here is convey my process to hopefully ease the pain for others that are considering this as a tool.
Welcome to The R/C Retard
This is my blog to document my experiences and progress as an aspiring pilot of quadcopters. In an effort to expand my video business, I intend to add aerial photography as a new service.
The video above, in my opinion, exemplifies the beauty of aerial photography. The use of framing, as well as camera and subject movement are excellent and provide us with something to aspire to. It documents how multi-rotor UAVs can be used to incredible effect for the photographic and videography worlds.
The current state of the drone industry in terms of public perception as well as the FAA's extremely slow reaction time in terms of creating rules for the safe use of drones has led some states to legislate in ways that are not reasonable for the professional videographer engaged in the legitimate and safe use of drones.
This blog will also report on issues that seem relevant to this fast changing world of drones or UAVs (Unmanned Aerial Vehicles). Going forward I will refer to these as UAVs or by their rotor designation (quad, hex, octo etc.) as the term drone has the negative connotation of the weaponized drones used by the military.
As I have started my journey into the world of multi-rotor UAVs, I am reminded of the nascent personal computer industry. Although when I started in that business, the name personal computer had yet to be coined and we just knew them as microcomputers. The rate of innovation and change in this field is just as incredible.
I think it's a very exciting time for the UAV pilot or pilot to be with new technologies emerging annually that hold great promise and spark the imagination. Products such as the DJI Phantom 3 and the Inspire 1, 3DRobotics SOLO and Lily are all amazing tools that broaden our reach as photographers and videographers.
As I write this, in August 2015, ideas like collision avoidance systems will be commonplace for Prosumer and professional UAVs alike in 2 years time. When you look at how accurate the GPS positioning is for these flying cameras, it's far from being able to do motion control but I suspect that day is not that far off.
As a final note, we do not monetize this blog. It is just a place for us to freely document our experiences with both the activity of aerial photography and videography as well as the products associated with it. When we talk about any products, we are describing our unvarnished opinions and experiences with the product, both good and bad.
Stay tuned for more!
Subscribe to:
Posts (Atom)